How to screen record, speed up my video& embed into my blog:
Step 1: Start a Screen Recording by opening QuickTime Player, selecting File → New Screen Recording

Step 2: Click on the red dot to record. For our purposes we will record our voiceover in iMovie after speeding up your video. If you would like to record audio at the same time click the arrow next to record and then select the microphone.
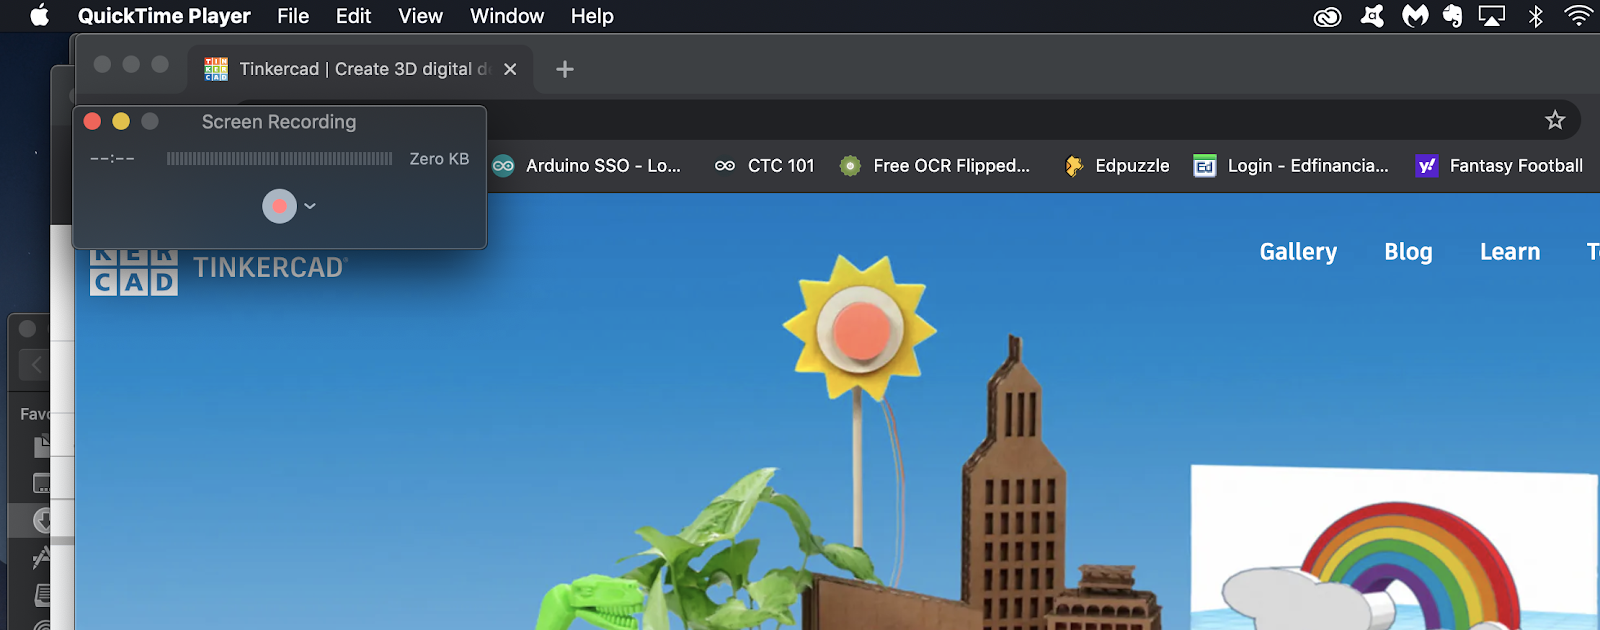
Step 3: Drag a box around the area you would like to record or simply click to record the full screen. When the small stop sign appears you know that you are recording. When it is on, but dim (as below) it is preparing to record, but has not yet started.

Step 4: Design as you would normally. Confirm you are recording by noticing the stop sign is white. When you want to stop recording click on the icon.

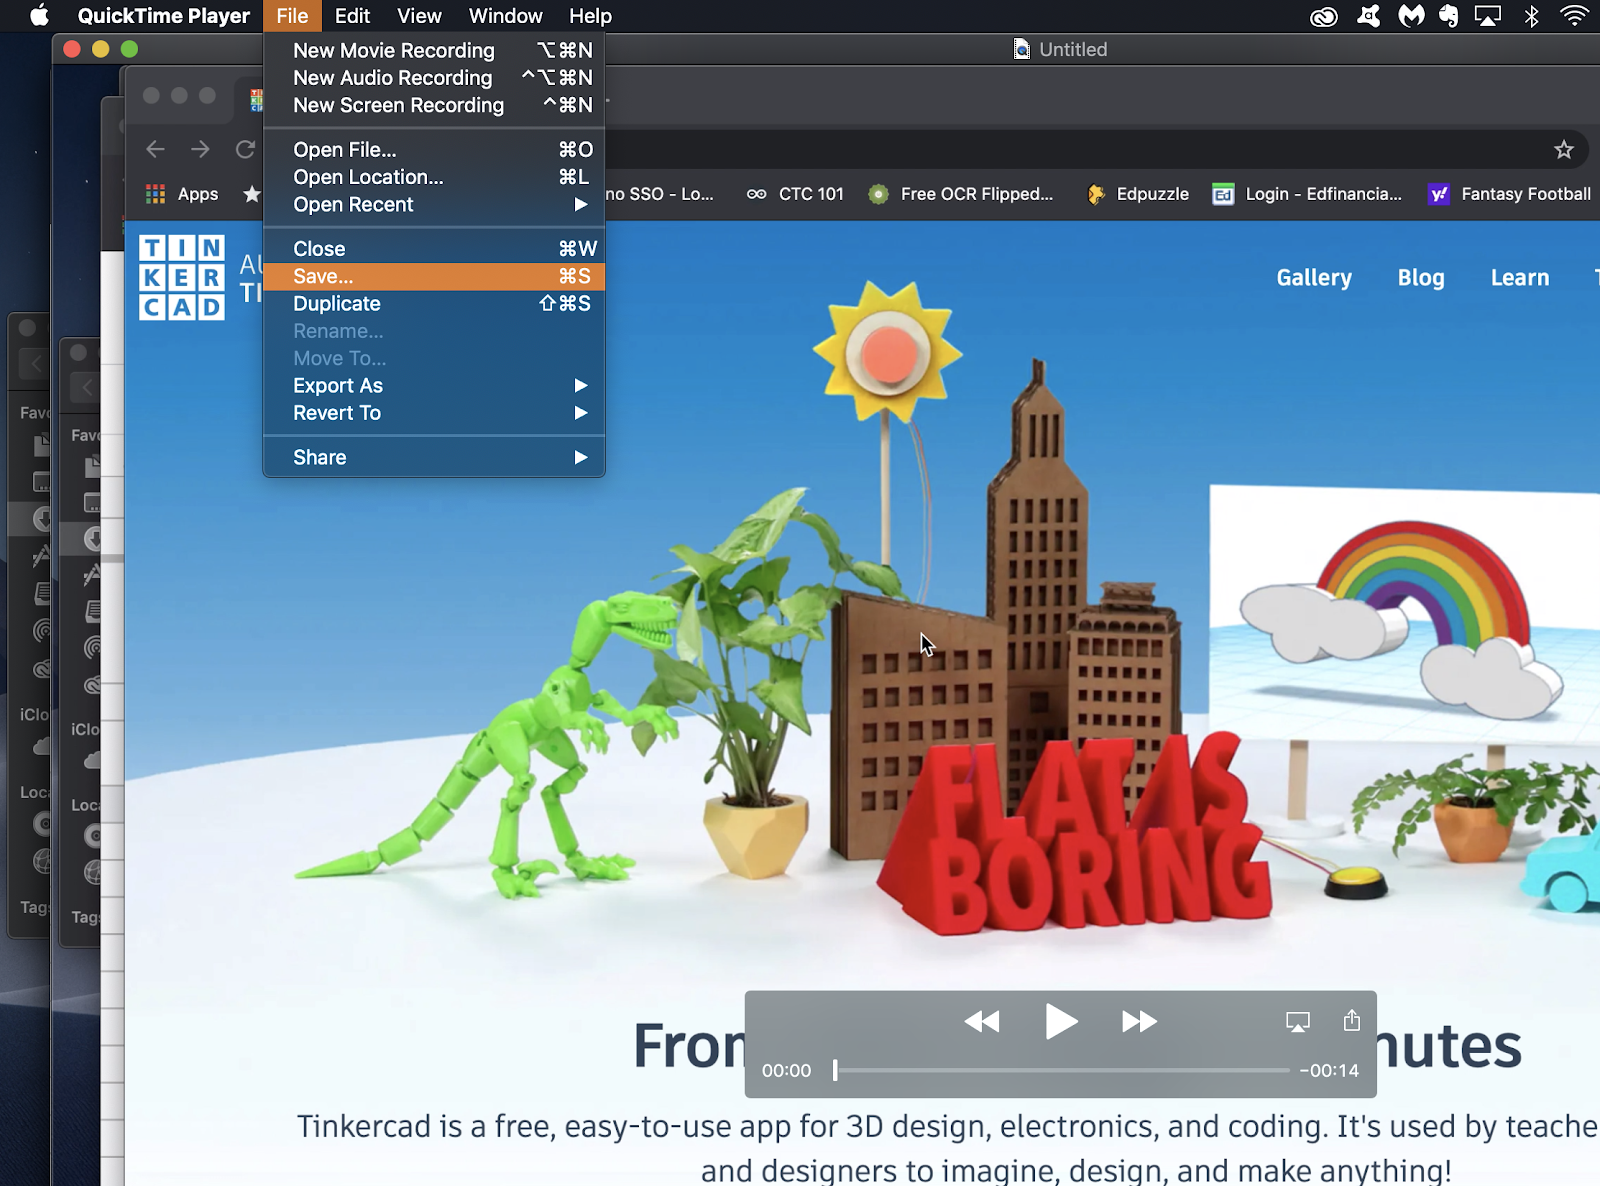
Step 5: Save your screen recording immediately by going to File → Save & choosing your Digital Design Folder.
Save your work according to the week and day of class meeting (for example “Week 5 Day 2”). This will make it much easier for you to put your videos together at the end of the week.
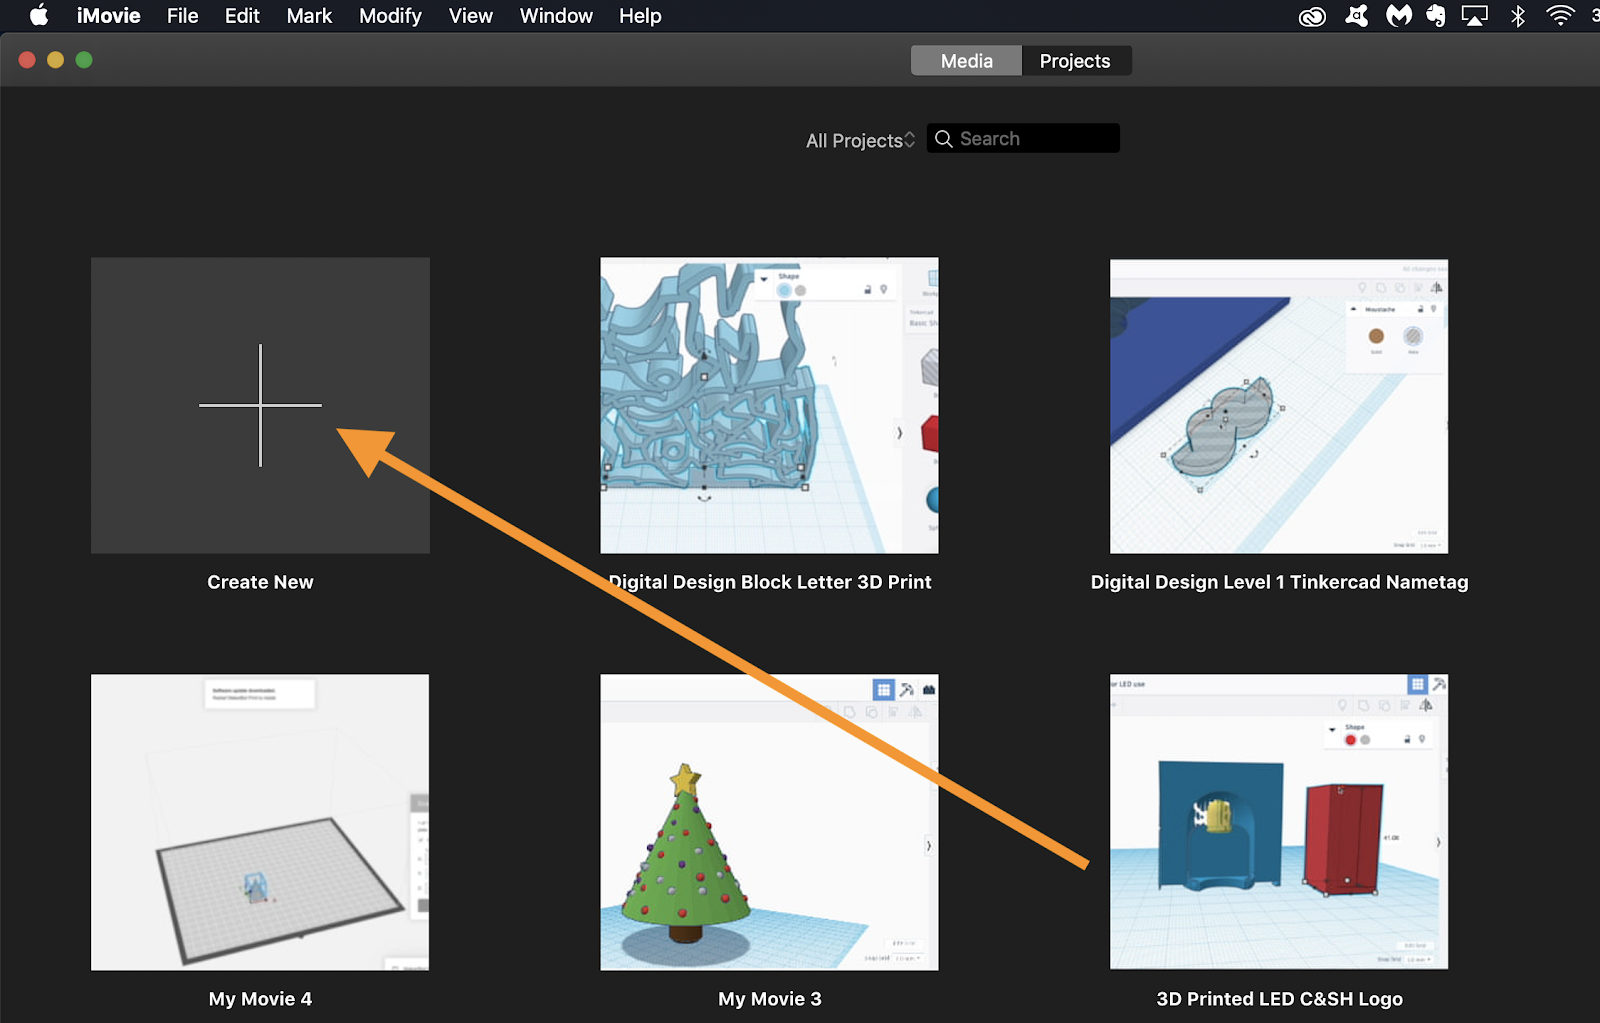
Step 6: Open iMovie, select “Create New” & then “Movie”.

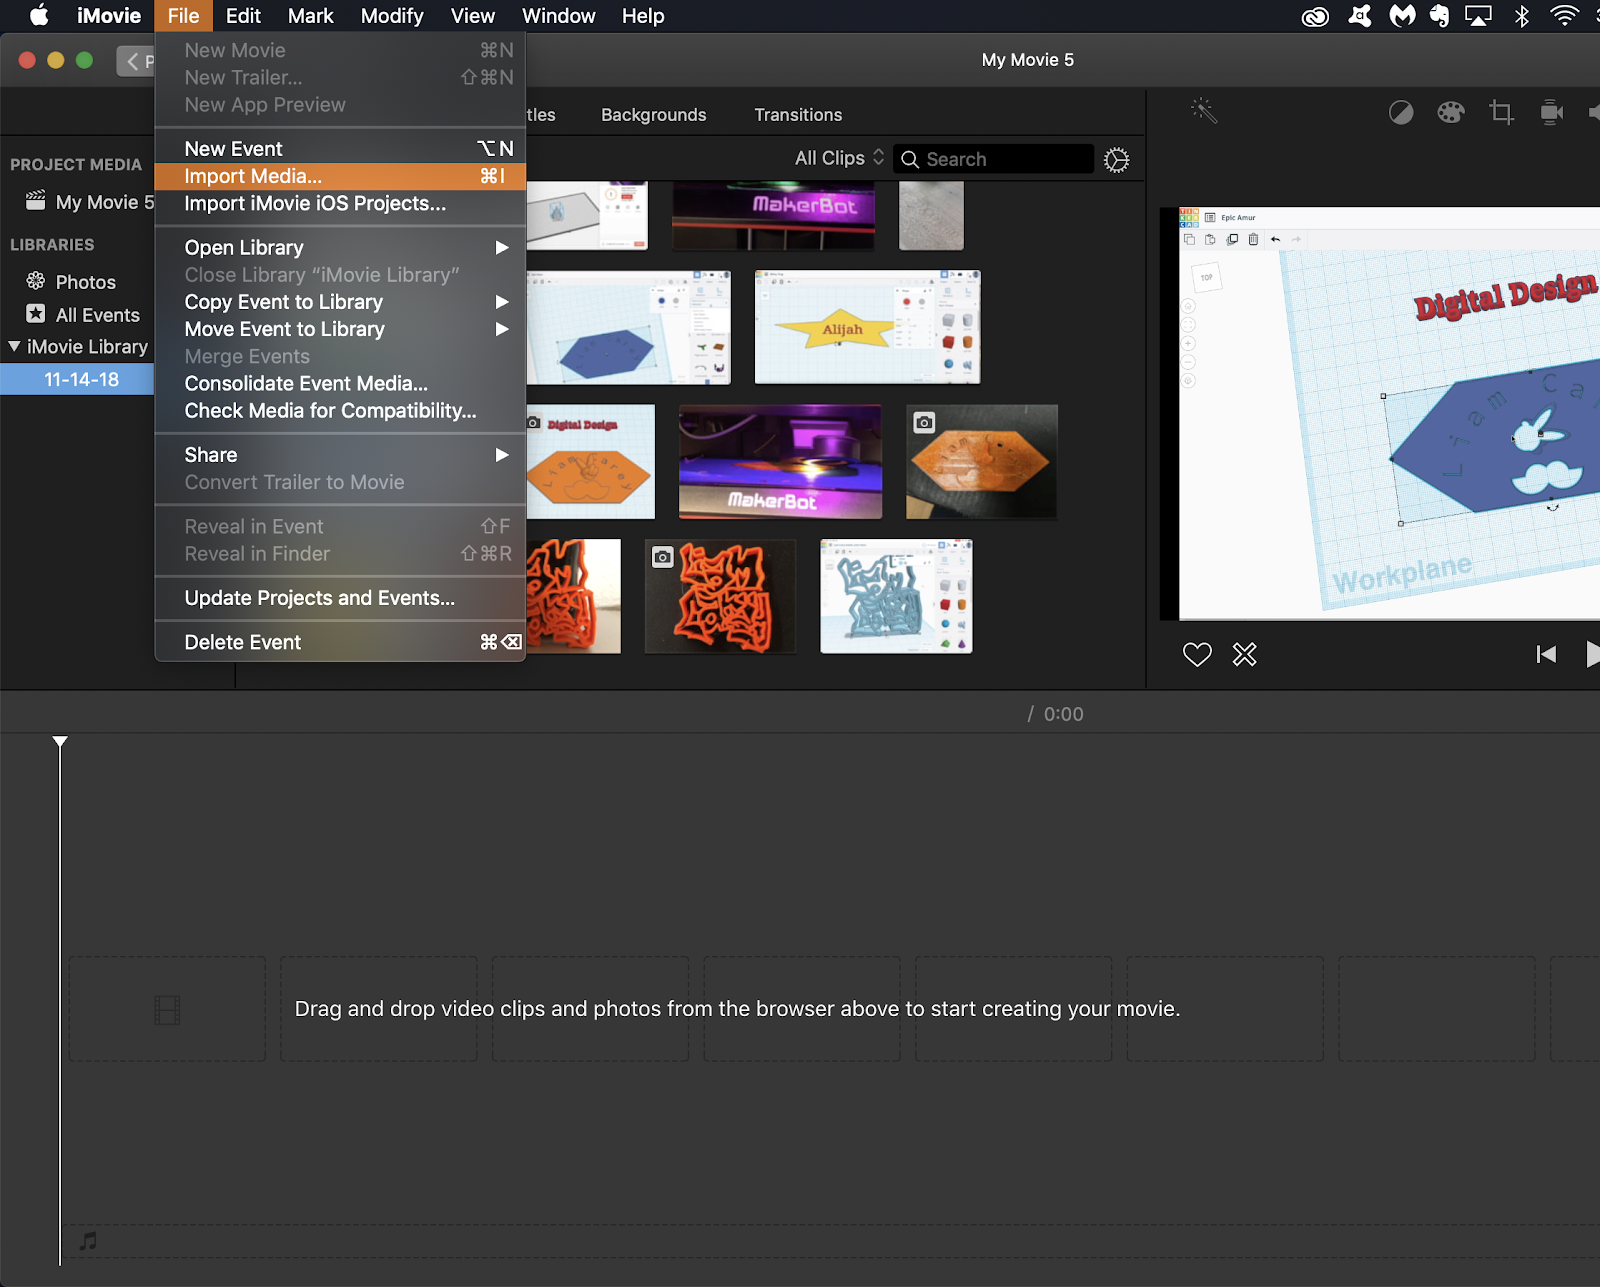
Step 7: Select File → Import Media and select the screen recording videos you made from the week (2 on a week when we meet twice & 3 during a week when we meet 3 times.
Step 8: Drag Videos to the timeline on the bottom. Add a title & transitions.

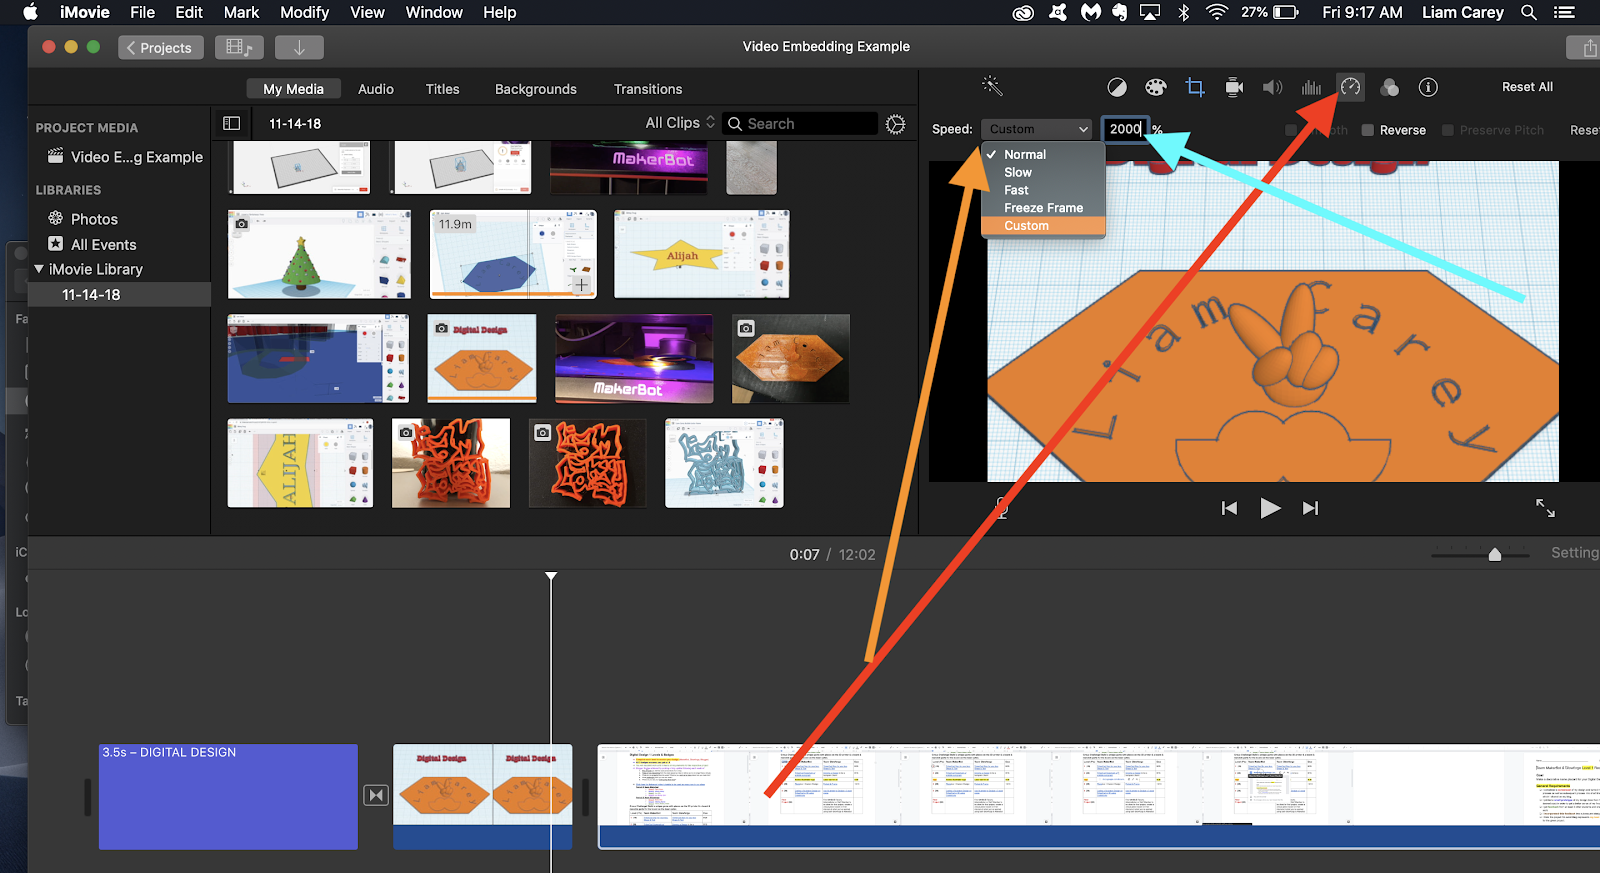
Step 9: Select your video in the timeline and then click on the speedometer above the video preview

Step 10: Select Custom from the “Speed” Dropdown menu. Then enter somewhere between 15x -25x the speed depending on your video. This means enter between 1500% & 2500%. Preview it to be sure it is the appropriate speed.
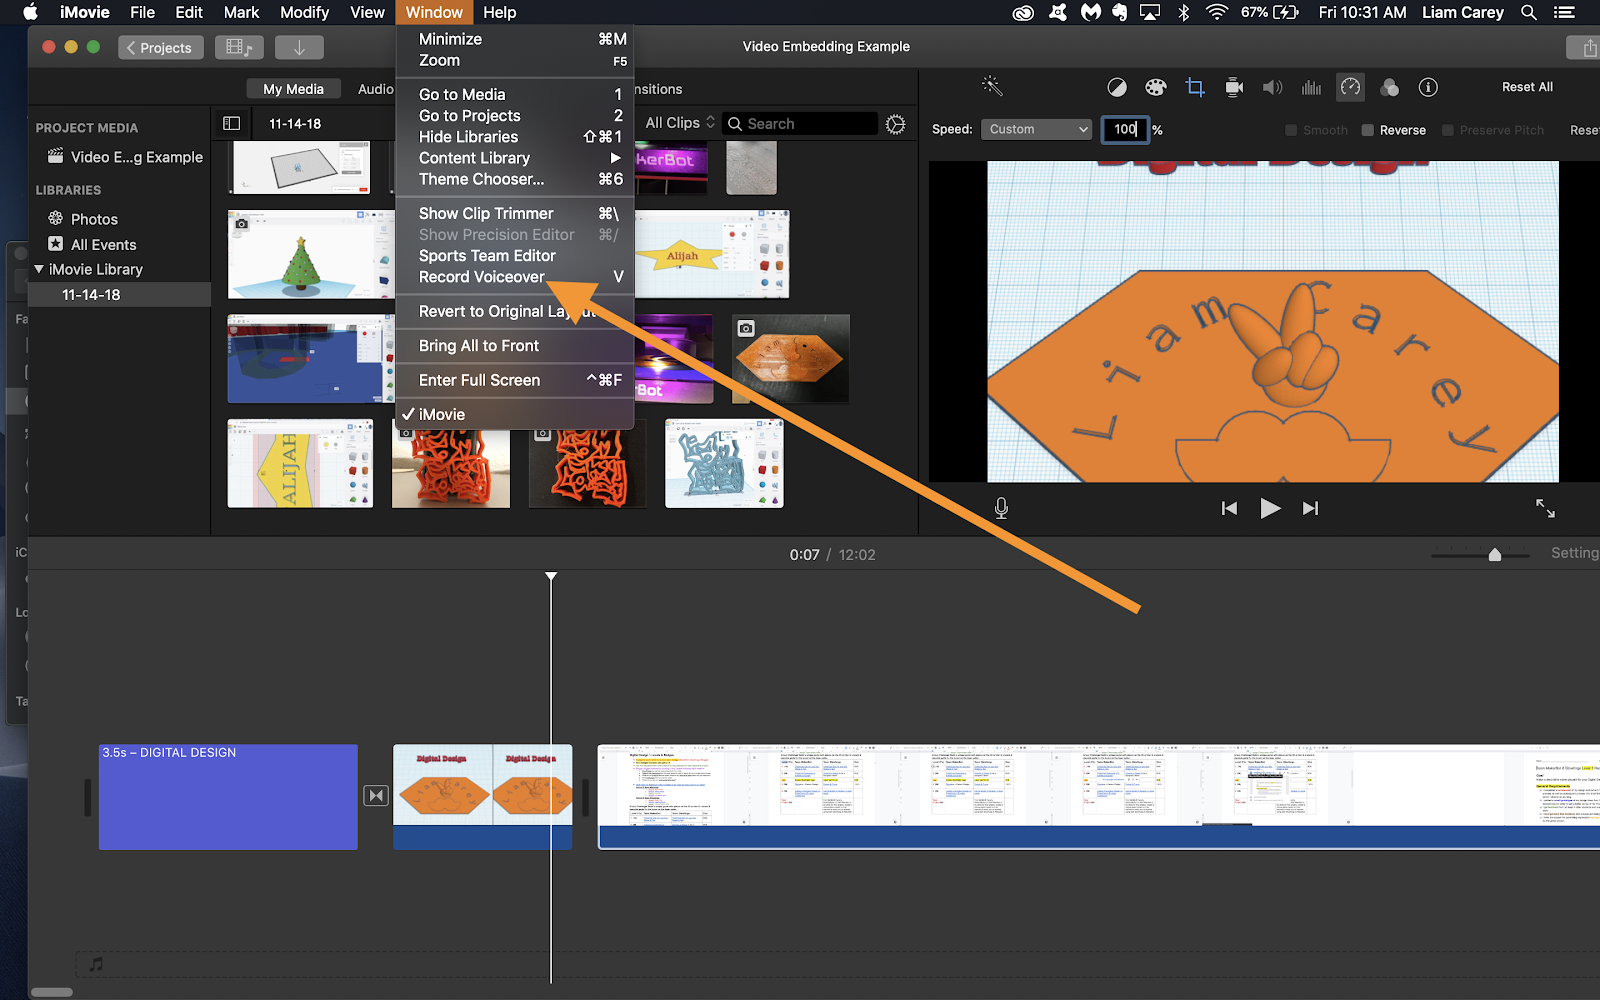
Step 11: Preview your movie & edit as needed. When the footage is set, go to the start of your movie & then record a voiceover by clicking Window → Record Voiceover.
Be sure to be close enough so your voice can be heard & far enough away so that it does not distort. You can also use
Voice Memo on your phone and then upload that file.
Voice Memo on your phone and then upload that file.
Include:
- What are you proud of from the week and what do you want us to know about this work? Successes…
- What was challenging this week & why?
- What are your plans for next week?
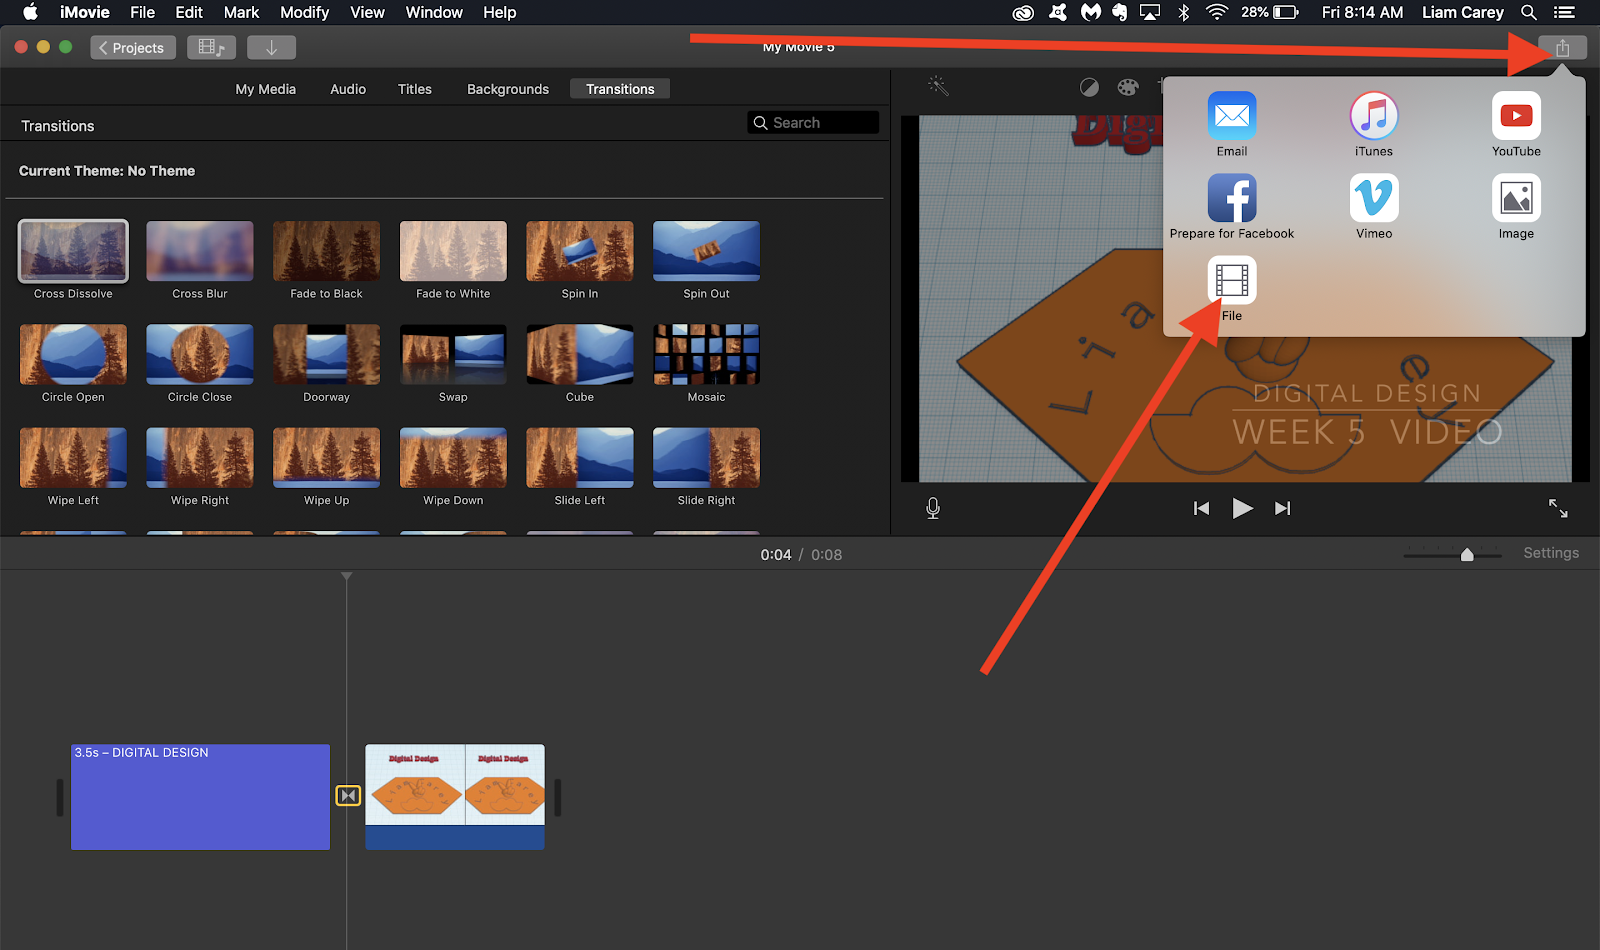
Step 12: Preview your movie & edit as needed. When the footage is set, click on the upload button in the upper right and then select “File”.
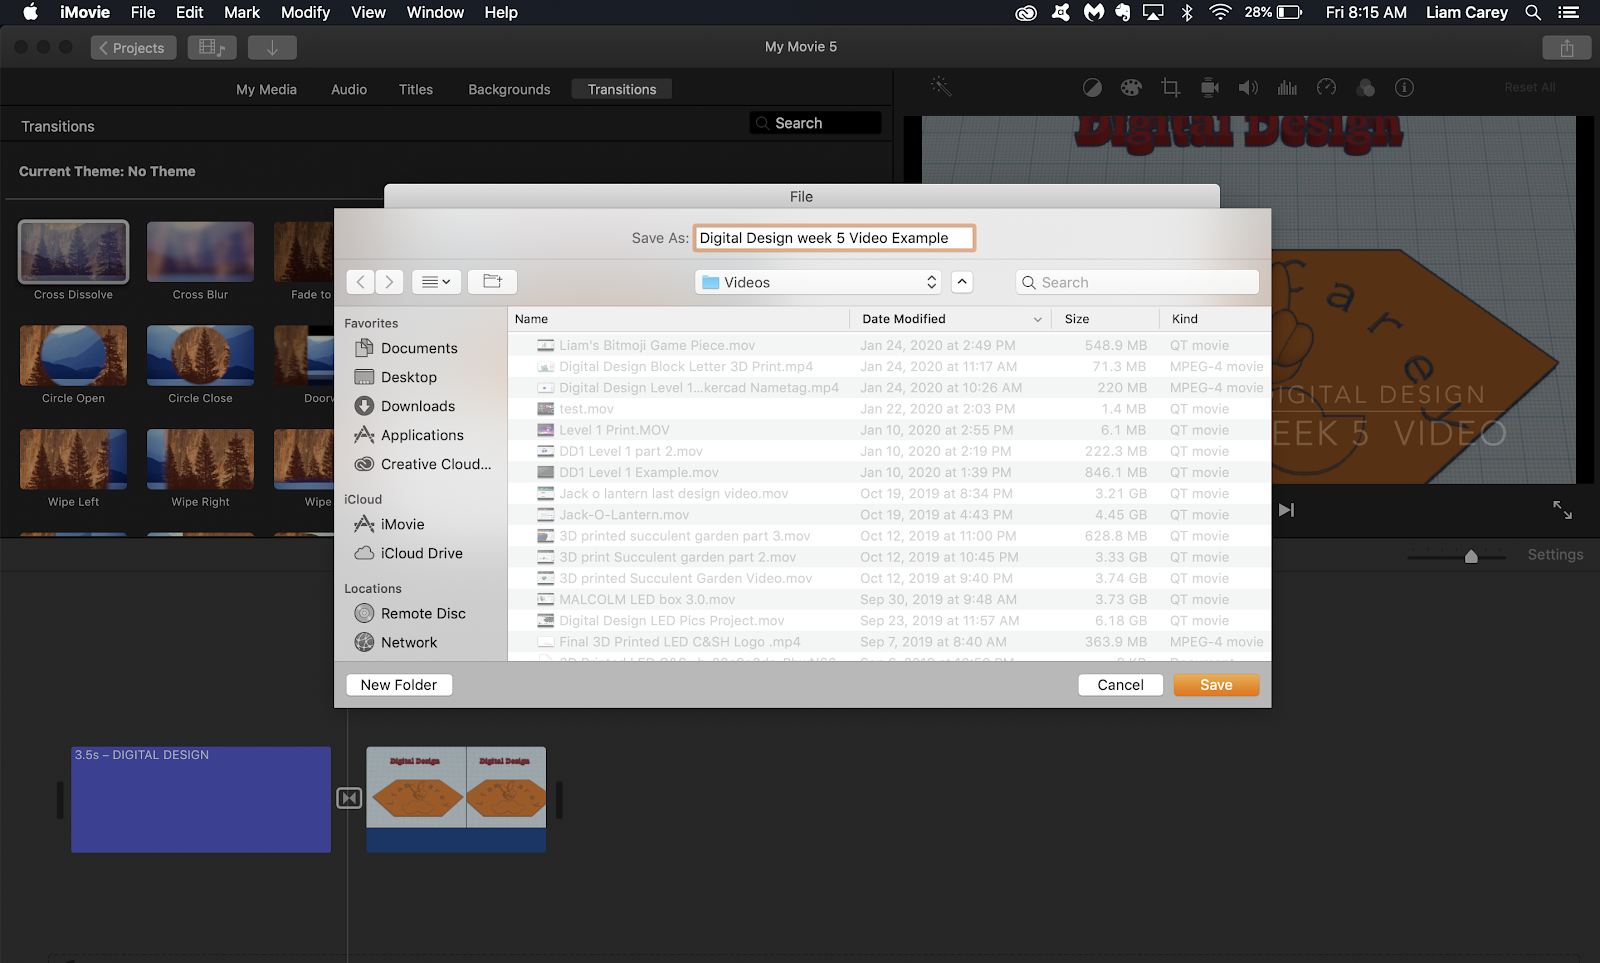
Step 13: Save your video in your Digital Design folder with the week that it reflects (for example: DD Week 5 Video). Then click “Next”

Step 14: Wait for the Circle in the upper right of iMovie to become completely white. The longer your video the longer this will take.

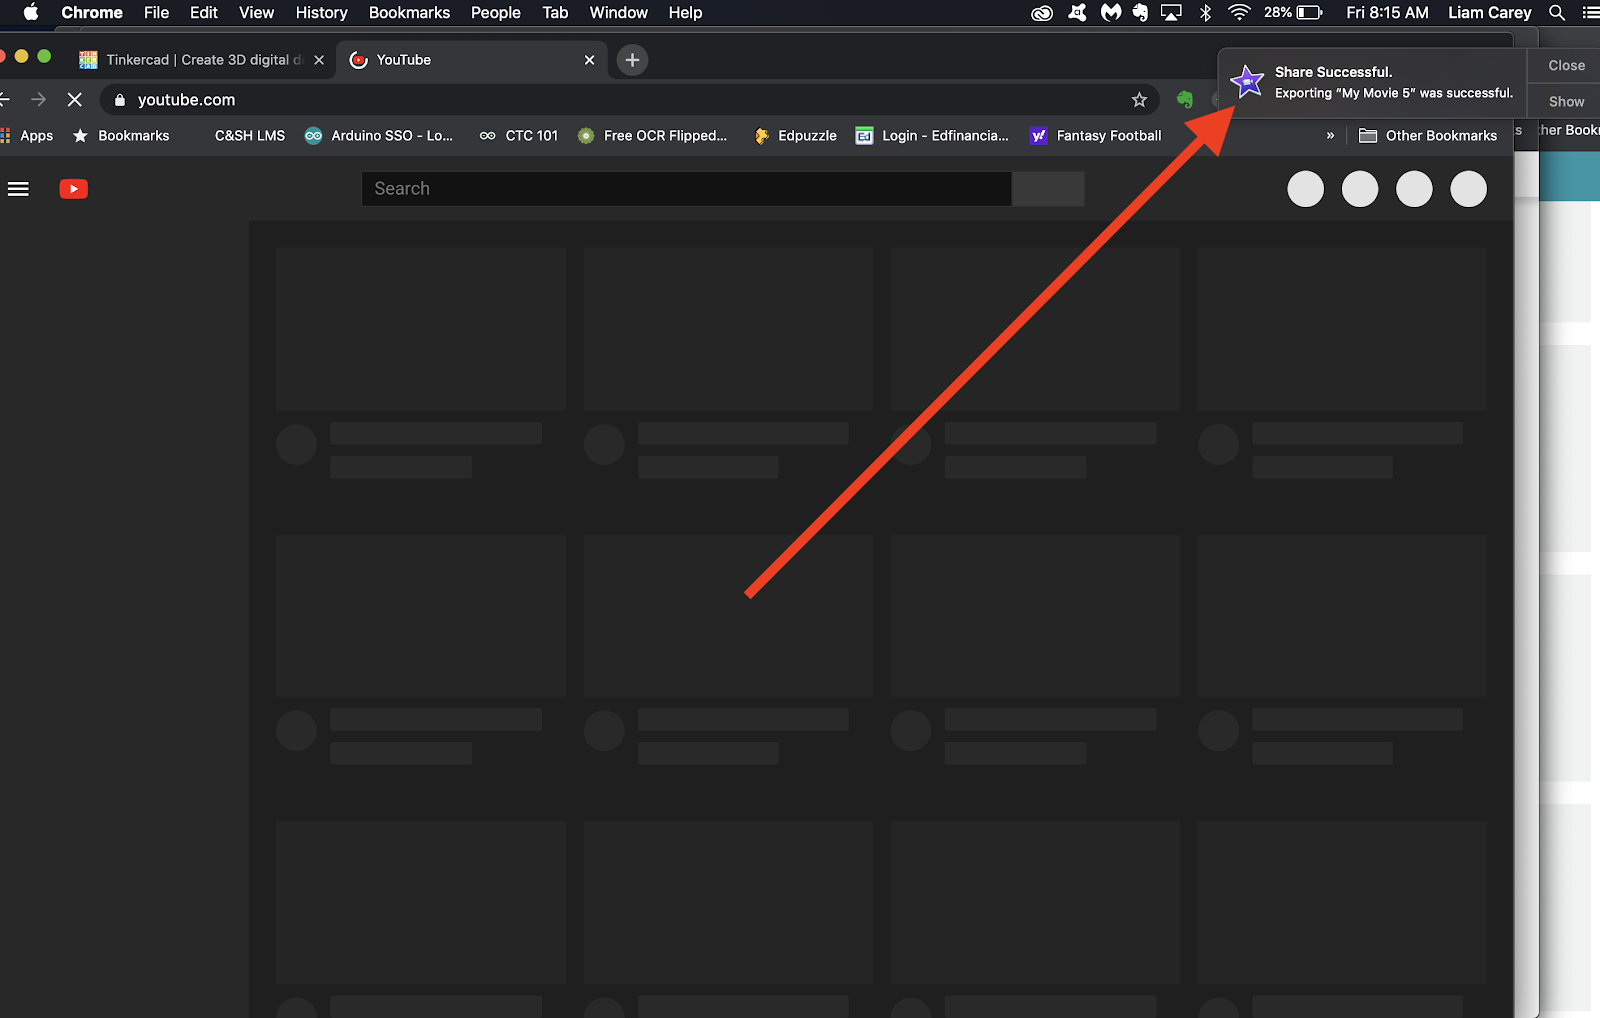
Step 15: You will see a “Share Successful” message in the upper right when the movie is done.
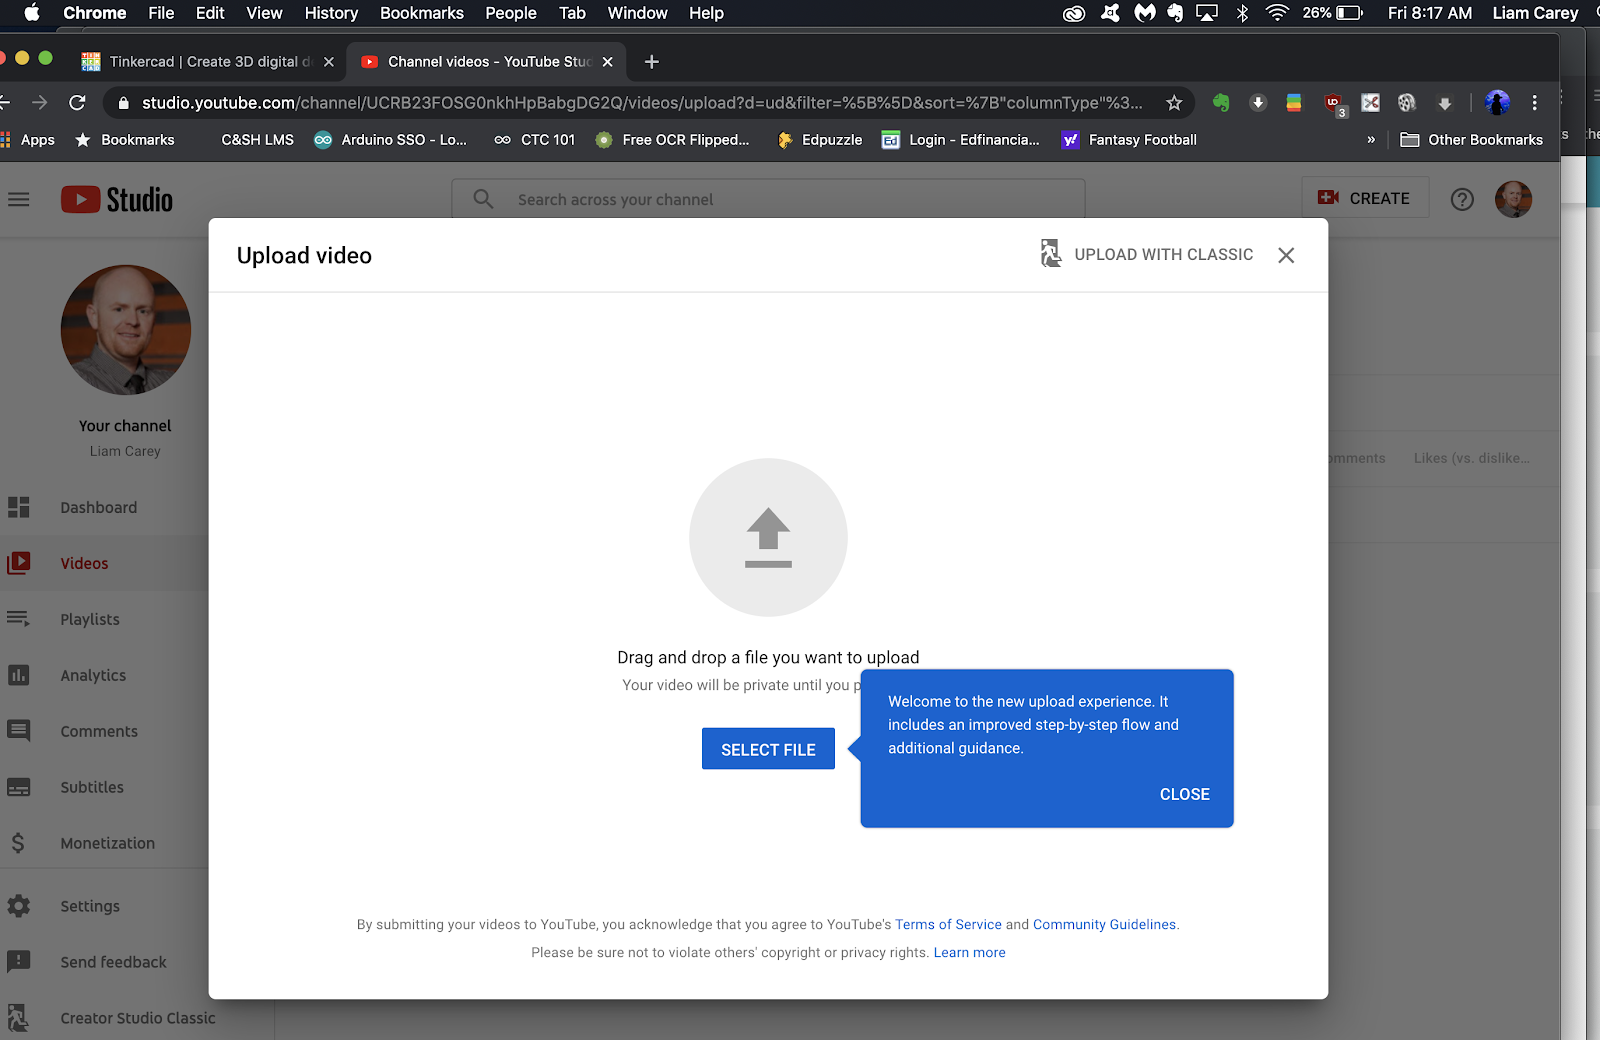
Step 16: Go to your school YouTube account & click on the upload button in the upper right.

Step 17: Either drag over your movie file or Click “SELECT FILE” & then choose your movie file.

Step 18: Select “Yes, it’s made for kids” & click “NEXT”

Step 19: On the “Video elements” screen you can just click “NEXT”

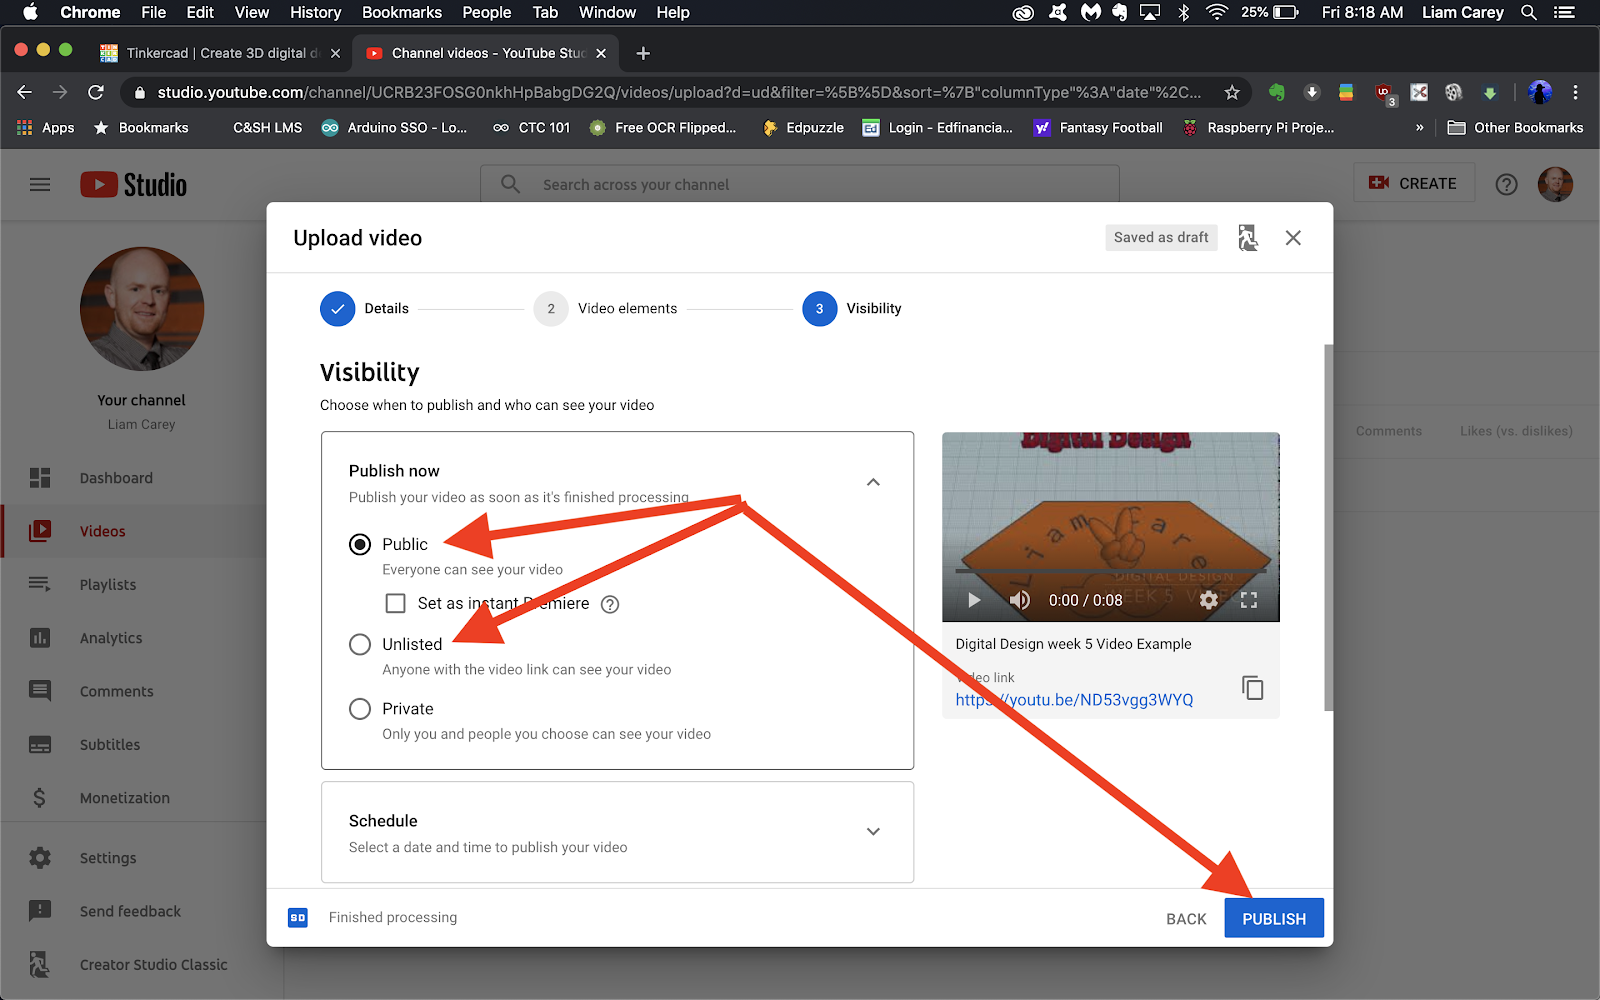
Step 20: On “Visibility” click on “Publish now” & then select either “Public” or “Unlisted” for your video setting. Then click “PUBLISH” in the lower right.

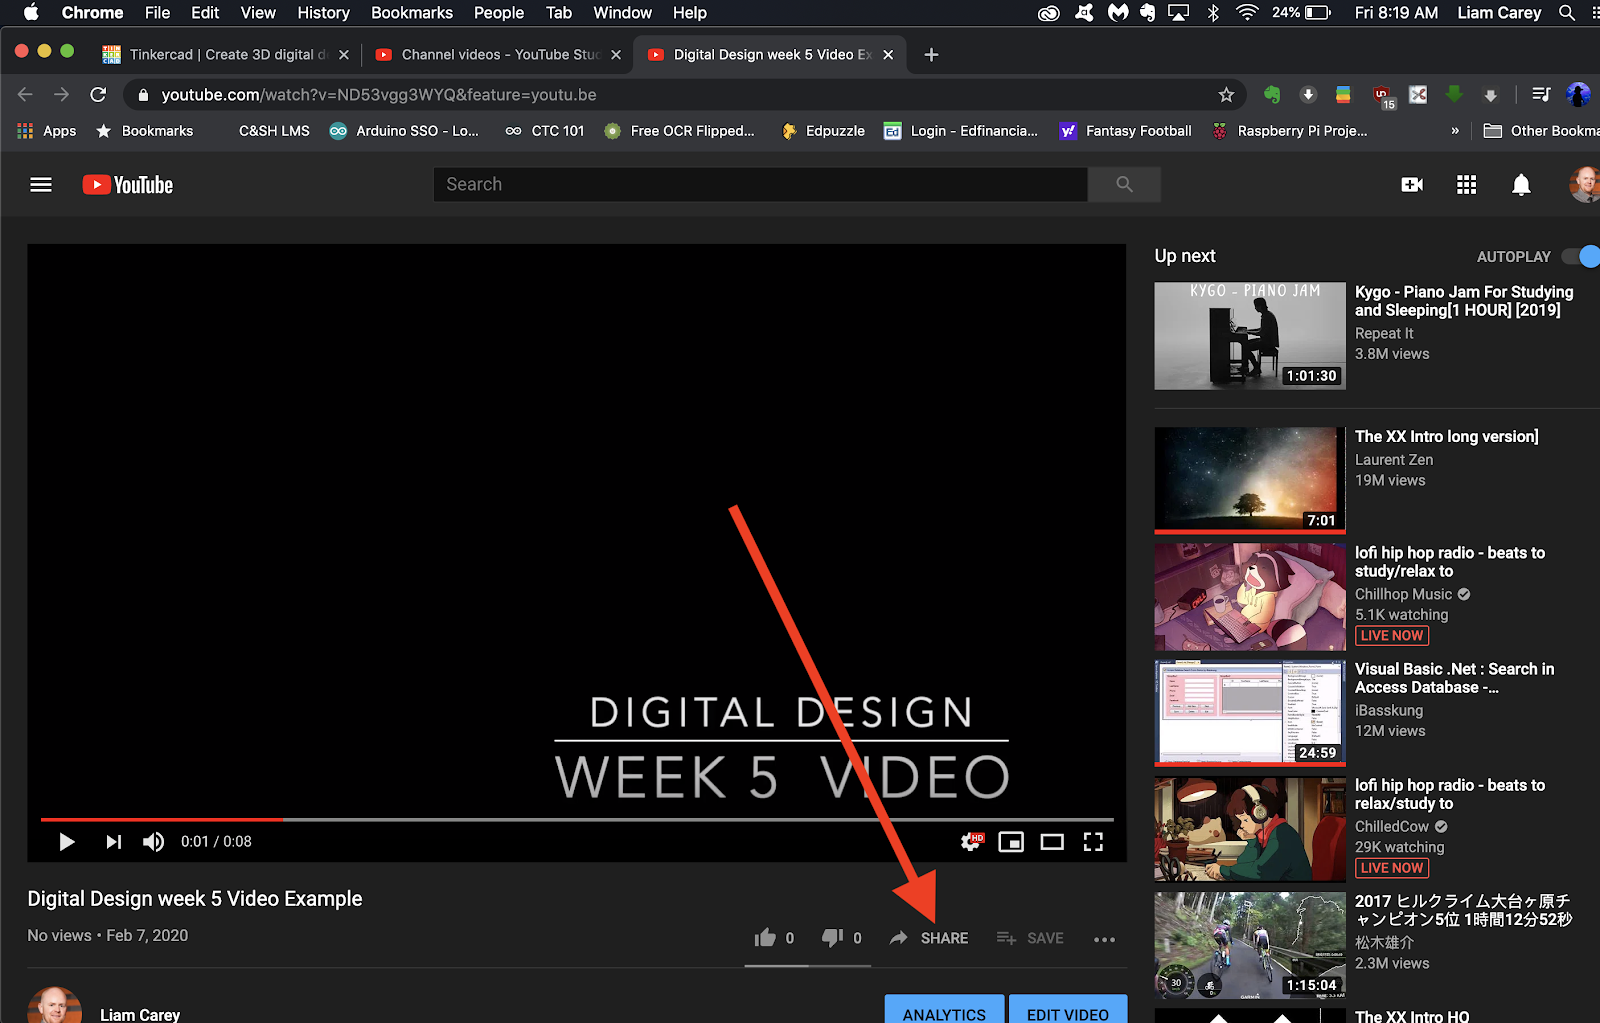
Step 21: Click on the Video link highlighted in blue.

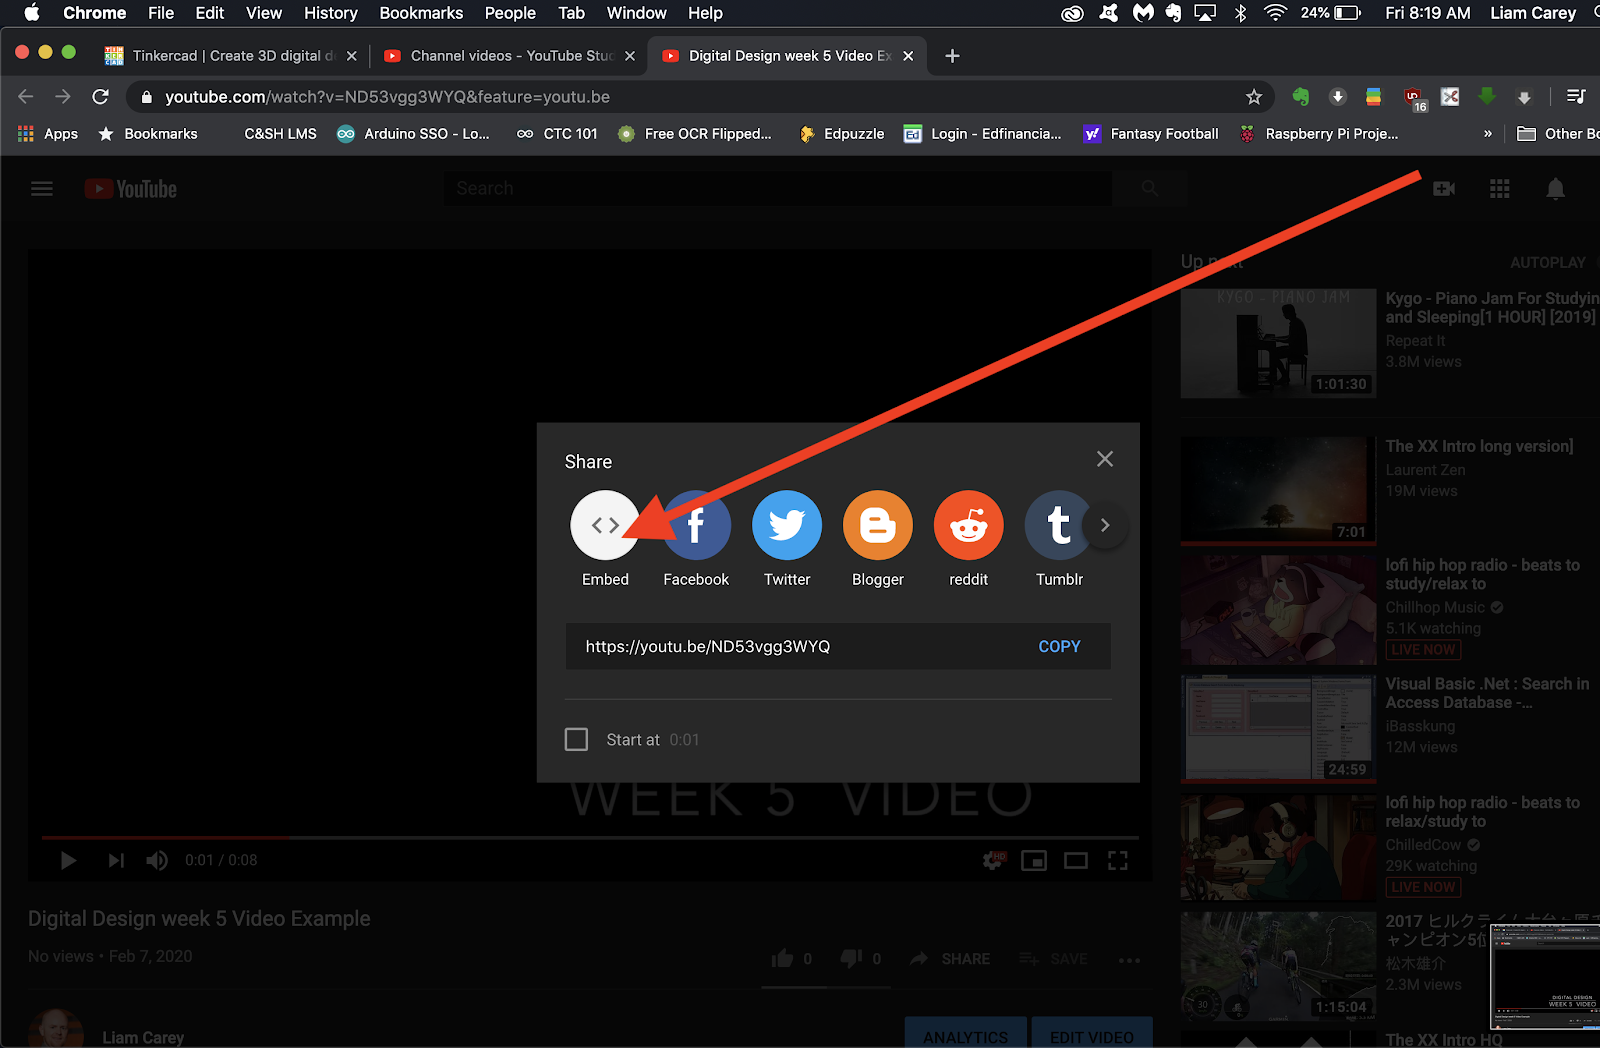
Step 22: Click “Share”
Step 23: Click “Embed” & then copy the code it gives you (command C on an apple or ctrl c on a pc)

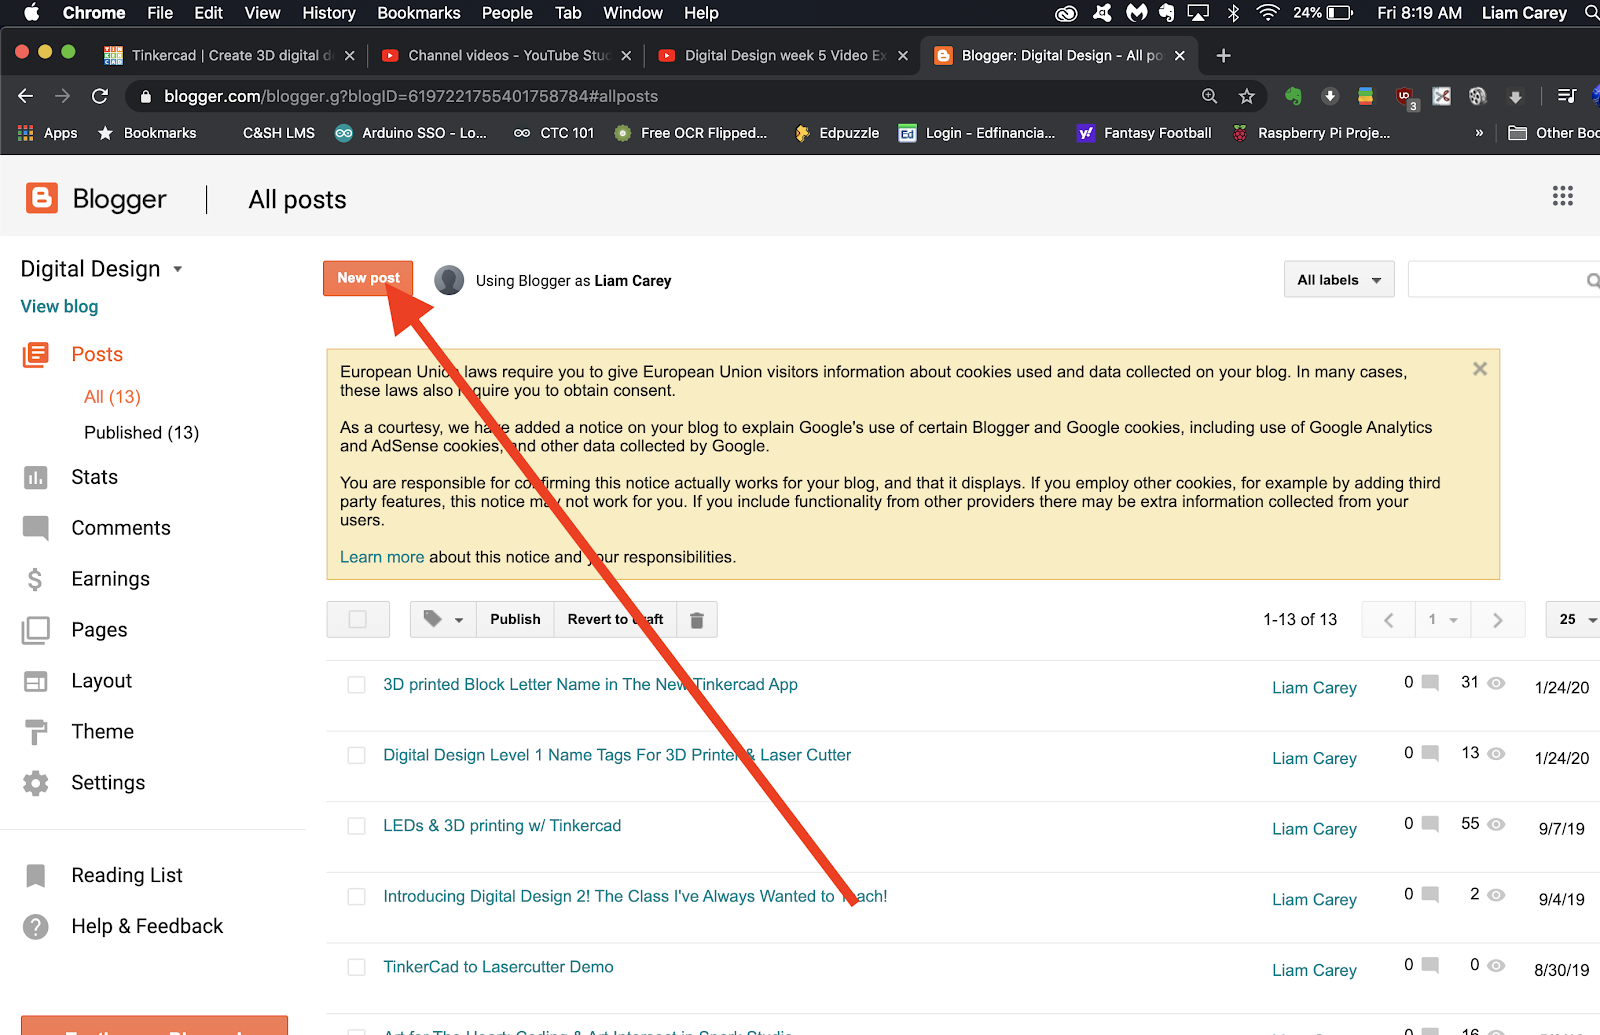
Step 24: Go to www.blogger.com using your school gmail login & select “New post” & then click on the “HTML” button in the upper left.

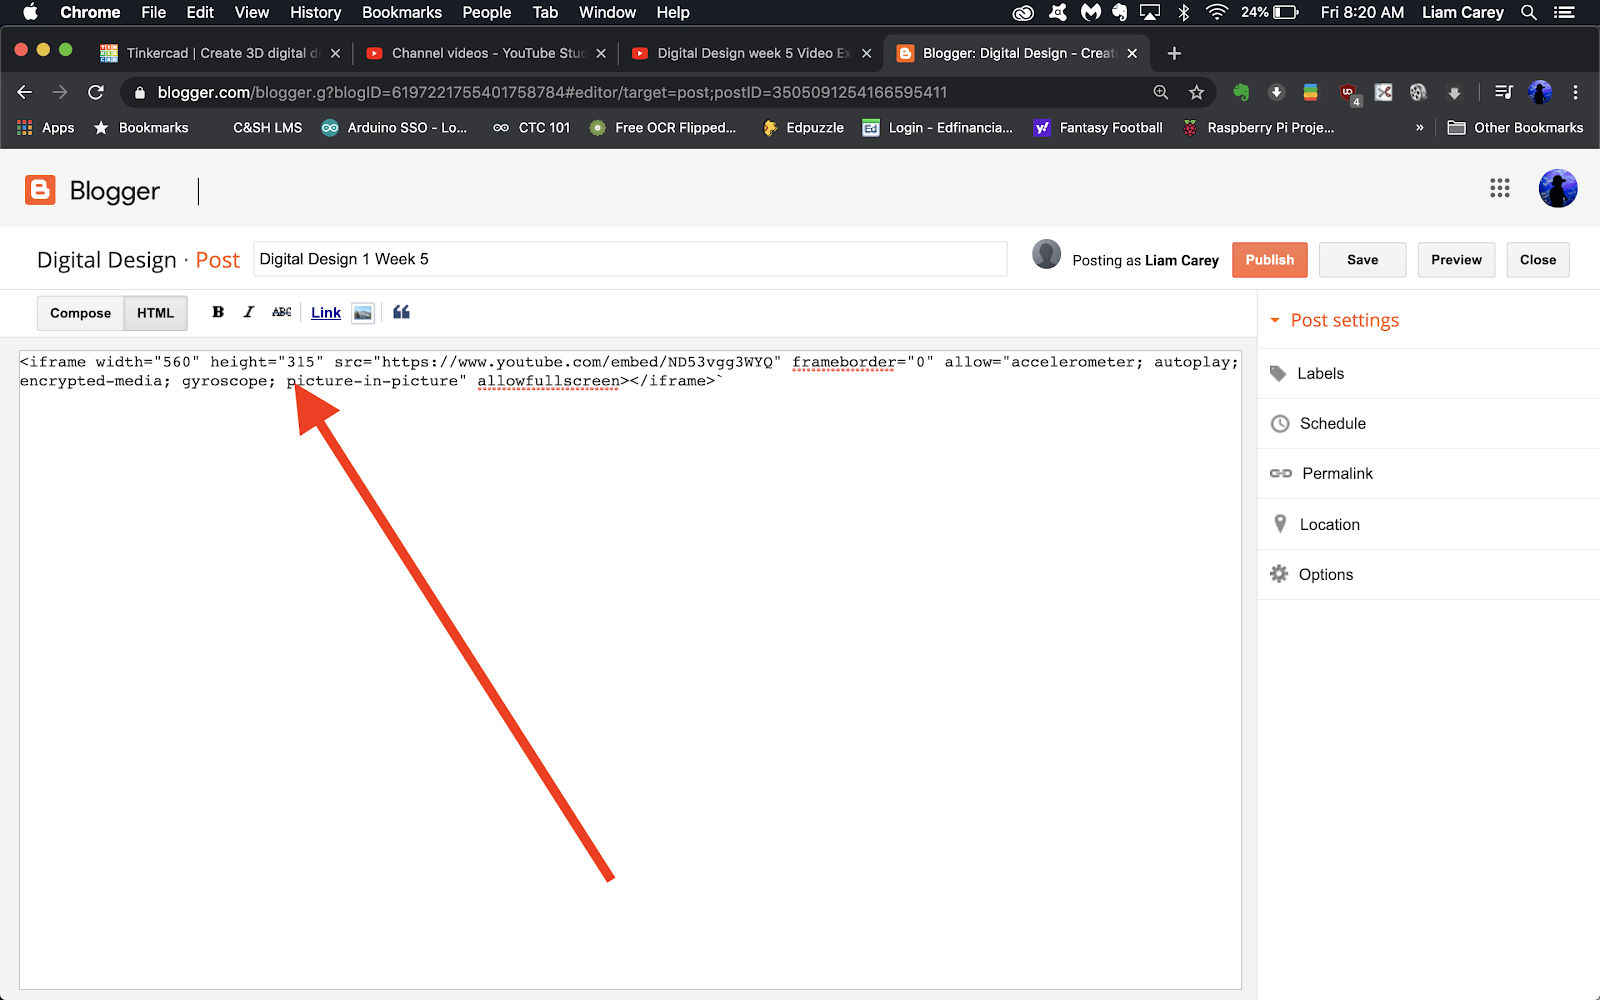
Step 25: Paste in the code (press command V on an apple and ctrl v on a pc) & then click back on the “Compose” button. Your video should now appear. Click “Publish”.

Step 26: Click “View blog” in the upper left to be sure your video posted


Comments
Post a Comment